

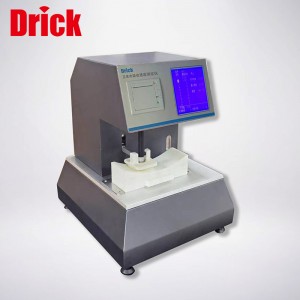
DRK110 Sanitary Napkin Absorption Speed Tester
Test item: Absorption speed test of absorbent layer of sanitary napkin
The DRK110 Sanitary Napkin Absorption Speed Tester is used to determine the absorption speed of the sanitary napkin, reflecting whether the absorption layer of the sanitary napkin is absorbed in a timely manner. Comply with GB/T8939-2018 and other standards.
Safety:
safety sign:
Before opening the device for use, please read and understand all operating and use matters.
Emergency power off:
In an emergency state, all power supplies of the equipment can be disconnected. The instrument will be powered off immediately and the test will stop.
Technical Specifications:
Standard test module: the size is (76±0.1)mm*(80±0.1)mm, and the mass is 127.0±2.5g
Curved specimen holder: length is 230±0.1mm and width is 80±0.1mm
Automatic liquid addition device: the liquid addition amount is 1~50±0.1mL, and the liquid discharge speed is less than or equal to 3s
Automatically adjust the stroke displacement for test test (no need to manually enter the walking stroke)
Lifting speed of test module: 50~200mm/min adjustable
Automatic timer: timing range 0~99999 resolution 0.01s
Automatically measure data results and summarize reports.
Power supply voltage: AC220V, 0.5KW
Dimensions: 420*480*520 mm
Weight: 42Kg
Install:
Unpacking the instrument:
When you receive the equipment, please check whether the wooden box has been damaged during transportation; carefully unpack the equipment box, thoroughly inspect the parts for damage, please report the damage to the carrier or the company Customer service department.
Debugging:
1. After unpacking the equipment, use a soft dry cotton cloth to wipe off the dirt and packaged sawdust from all parts. Place it on a firm bench in the laboratory and connect it to the air source.
2. Before connecting to the power supply, check whether the electrical part is damp or not.
General test Operation Steps:
1. Plug in the national standard power cord, supply power to the instrument, and then flip the red rocker switch to make its indicator light;
2. Click the [Settings] button to enter the setting interface, and set the volume of the test solution, the number of times and the interval time between the times of the rinse times; then click the [Next Page] of the setting interface to enter the next page of the setting interface. The operating speed of the instrument, the number of penetrations required for each test and the time interval of each penetration test:
3. Click the [Test] button to jump to the test interface, click [Rinse] and press the silver button to perform pumping and vortex washing on the test tube, and wait until the rinse is completed (you can first set the test solution volume to be larger when making and washing, such as :20nl, after finishing the rinse, remember to modify it back to the real number test
capacity):
4. After the rinsing is completed, install the sample, and connect the sensor of the upper fixture to the instrument, click [Start] to press the group, and wait for the test to be completed:
5. After the experiment is completed, click the [Report] button to enter the report interface and view it as a real digital camera.
6. After the experiment is completed, please change the test solution to the cleaning solution, open the setting interface and set the number of rinses to be greater than 5, the rinse time is equal to! Move, and the residual test solution in the test tube is cleaned several times;
7. When not doing experiments, please clean the pipes with clean water;
Maintenance
1. Do not collide the instrument during handling, installation, adjustment and use, so as to avoid mechanical damage and affect the test results
2. The instrument must be placed in a studio far away from the vibration source, and there is no obvious air convection to avoid affecting the test results.
3. The instrument is frequently used and should be checked once a week to ensure normal use: if the instrument is used occasionally, or after being moved or repaired, it should be checked before the test.
4. The instrument should be calibrated according to the regulations on a regular basis, and the period should not exceed 12 months.
5. When there is a malfunction inside the instrument, please contact the manufacturer or ask a professional to repair it; calibrate the instrument before leaving the factory. Non-professional verification and maintenance personnel shall not disassemble the instrument arbitrarily.
Products categories
-

Phone
-

E-mail
-

Whatsapp
-

Top